

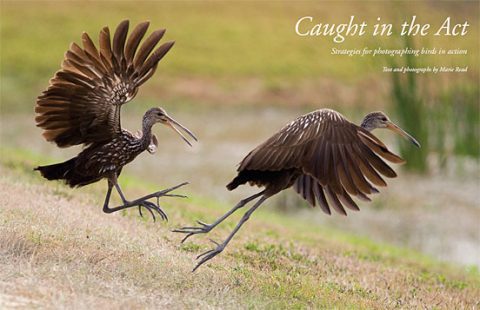
How to Get Close to Birds: 4 Strategies from a Photography Pro
By Melissa Groo
June 22, 2020

From the Summer 2020 issue of Living Bird magazine. Subscribe now.
One of the most challenging aspects of bird photography is “gaining an audience with birds,” as I like to say.
If you’ve spent any time in the field pursuing birds with a camera, you’ve most likely discovered that locating birds is the relatively easy part, especially now that we have tools like eBird. What’s trickier is keeping birds from seeing you as a predator, fleeing as soon as you draw closer or raise your lens.
In my own journey as a bird photographer, I’ve discovered that knowing how to approach birds, how to simply be around birds, is just as important as knowing which lens to use. Fortunately, there are a number of strategies to make birds more comfortable with your presence and attention, as well as tools that can help you blend into the background.
Try These Approaches to Gain an Audience With Birds

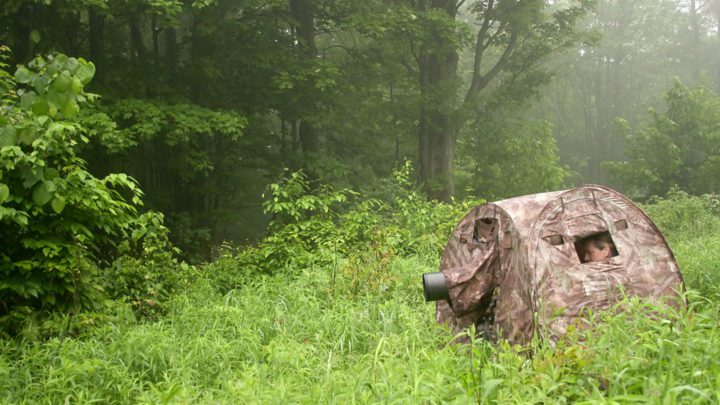
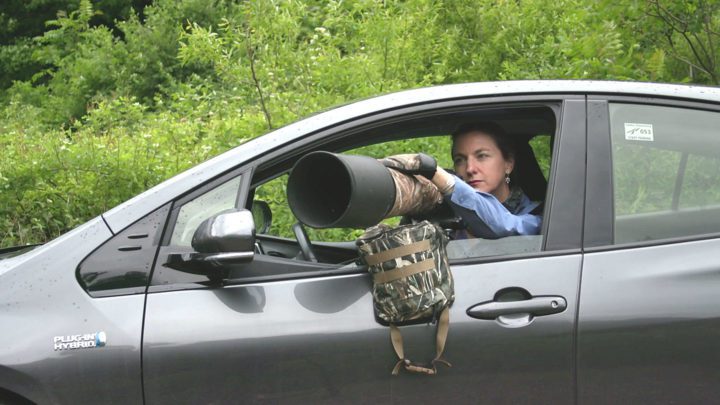
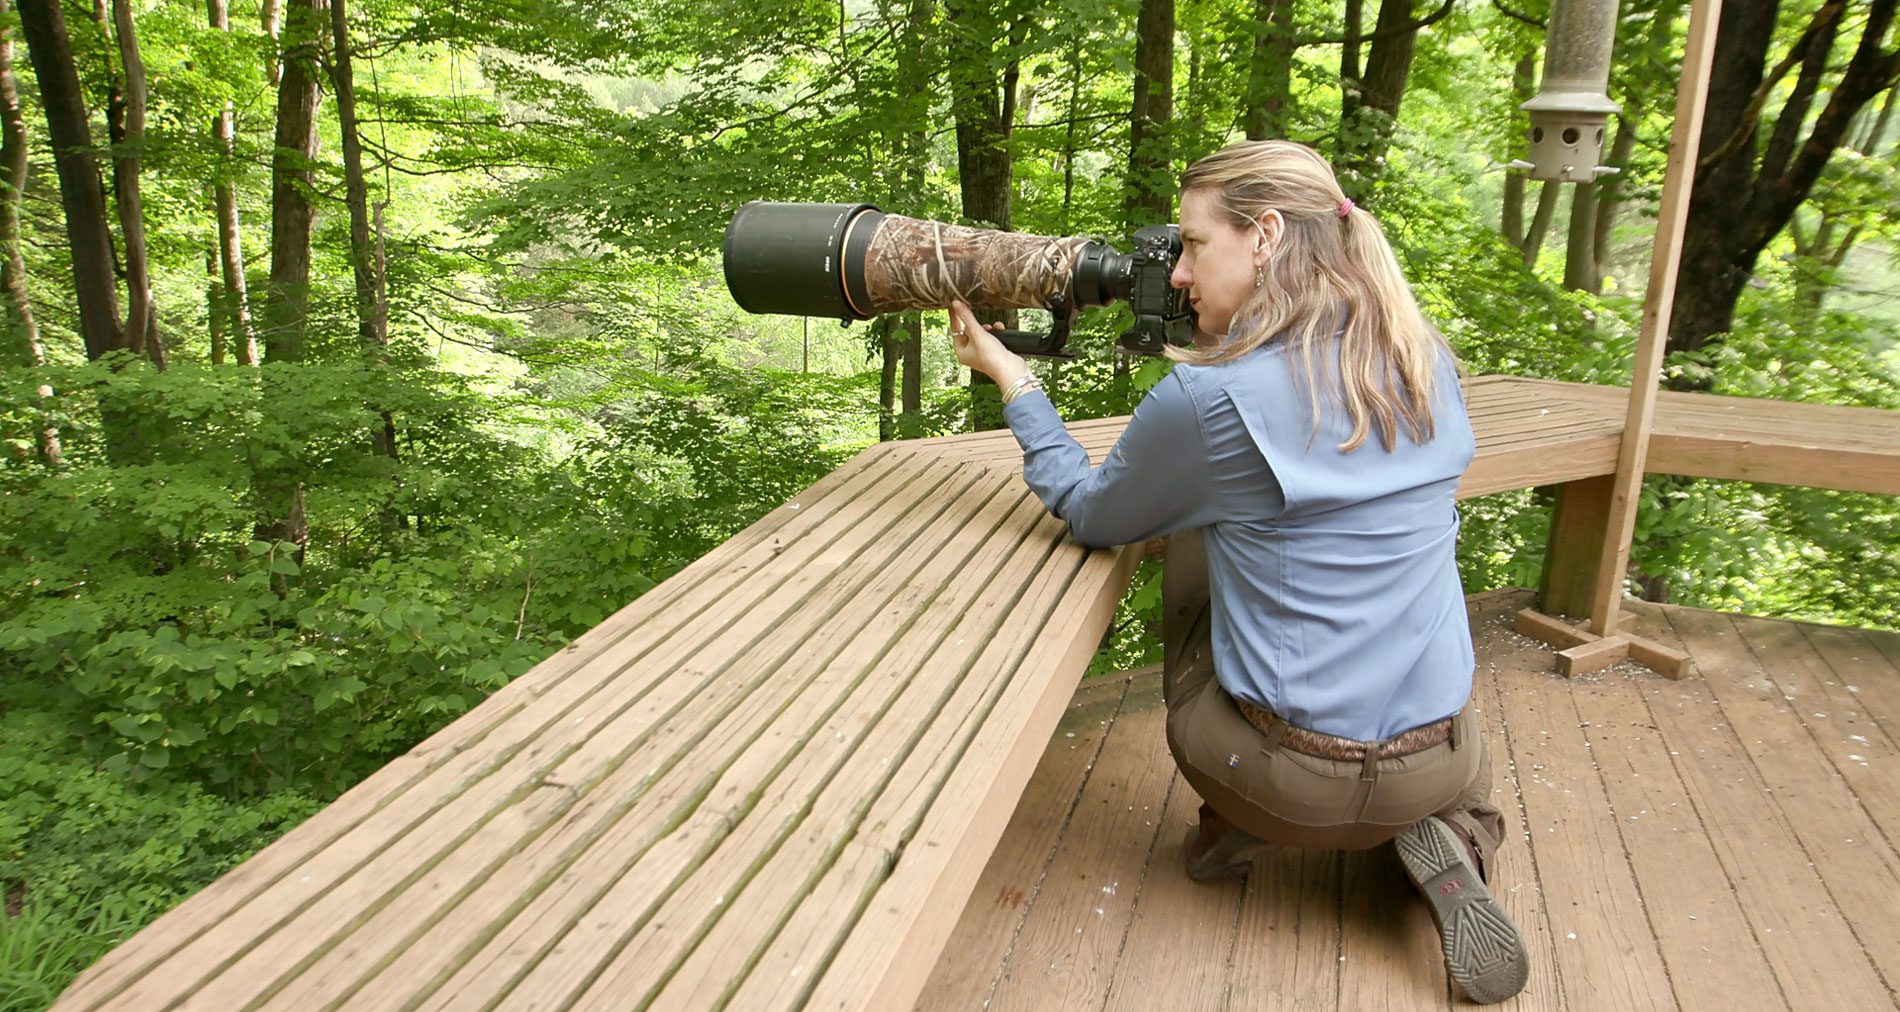
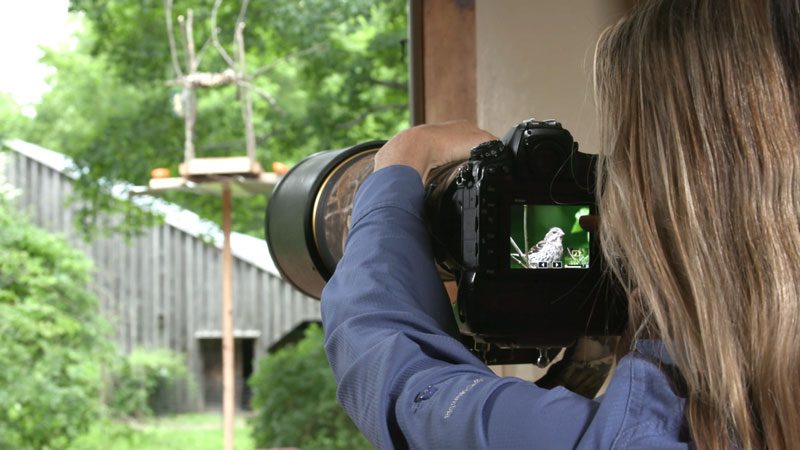
A Tragopan V6 pop-up tent blind. Image by Karen Rodriguez. Groo uses her car as a blind. A LensCoat Lensack Pro Beanbag helps to steady the telephoto camera lens. Image by Karen Rodriguez. A PGear Kwik Camo pop-up tent blind. Image by Karen Rodriguez.

1. Go Under the Radar With a Photography Blind
Blinds, or hides, are an absolutely essential tool for bird photographers. They allow us to enter the world of birds in a much less intrusive way than if we’re visible. It’s not that the birds don’t know we’re in there, as their senses are keener than ours, but we simply don’t present the same level of threat. If they don’t see the human form, birds are less likely to flee.
Find out More: Photography and Birds
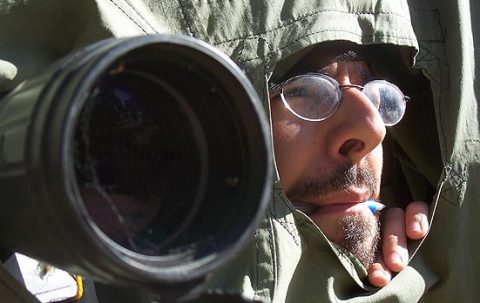
A body blind is an ultraportable blind made to fit over you and your tripod, camera, and lens, concealing you in a camo-patterned cloth. It can be used with or without a chair. Body blinds are best for settling in at one spot for a while, where you’re fairly certain birds will visit—maybe near a tree trunk dripping with sap that is attracting Yellow-bellied Sapsuckers, or a tree with a pile of wood shavings at its base from a Pileated Woodpecker’s drilling.
Two popular models among bird photographers are the LensCoat LensHide and EPGear’s Kwik Camo. If you’re handy with a needle and thread, you can try making your own blind with camouflage cloth and netting.
Pop-up tent blinds are a roomier option. They’re secured to the ground with stakes and usually have flap windows on each side. Brands like Ameristep make inexpensive tent blinds for hunters that come in a carrying case and readily pop open into a small domed structure. However, the best choices are blinds made specifically for photography. The leader in this field is Tragopan. Their blinds are well made and durable and offer a fully customizable window system, as well as three-way zippers that accommodate tripod legs.
Then there’s the often-overlooked blind many of us already own—a car! Unlike the others, it’s a mobile blind, allowing you to roam and search for your subjects. In a car, you’re comfortable and still somewhat concealed. Birds also appear to be more comfortable with humans in cars, rather than on foot. There is definitely an art to shooting from a car, and in my online Bird Academy course I share tips and techniques that will help you maximize their potential.
There are also permanent photography and observation blinds available to the public at many nature preserves and national wildlife refuges.

2. Find a Quiet “Sit Spot” and Let the Birds Come to You
Another way to immerse yourself in the environment is to establish a sit spot. Over 100 years ago, Ernest Thompson Seton—wildlife artist, writer, and founder of the Boy Scouts of America—came up with the idea of the “Seton Spot” (now called the sit spot), still used by nature programs today. It’s based on the principle that when you first enter wildlife habitat, animals flee to hide or distance themselves from your perceived threat. However, if you sit still and quietly, in an unobtrusive spot, things return to normal in roughly 20 to 30 minutes. Birds and other wildlife resume foraging, proclaiming territory, building nests, and so on, because they no longer see you as a threat. The longer you sit, the more you are likely to see.
The best places for sit spots are near the essentials for birds: food, water, or migratory pathways. Forest ponds or streams can be hubs of activity, especially if there aren’t other sources of water nearby. One strategy is to look for edge habitat; where a field meets a forest, for instance, you’ll find a greater diversity of species.
Learn More With Our Photography Course
In our online, self-paced Bird Academy course, instructor Melissa Groo will help you capture stunning images, no matter how modest or ambitious your goals. You’ll learn how to:
- Find and get close to birds responsibly
- Match your gear to your goals: cameras, lenses and tripods
- Optimize your camera’s settings for bird photography
- Capture stellar images of birds in flight
Learn more about the course and save 20% with coupon code PHOTO20: Bird Photography with Melissa Groo.
You may need to visit several sit spots before you decide on the one you want to invest time in. Try to choose a place not far from home, even if it’s in a quiet section of an urban park, since you’ll be more likely to spend time there if it’s a quick trip. Visit your sit spot during different seasons and you can track the changes in the habits, species composition, and appearance of the birds there.
3. To Approach a Bird on Foot, Zigzag as You Walk
If you’re on foot, never approach birds directly if you can help it. If you walk straight toward them, you’ll send them fleeing in the other direction. It’s much better to head in their general direction in a roundabout or zigzag manner, moving slowly, avoiding eye contact, and timing your movements with theirs—kind of like the game of Red Light, Green Light you may have played as a kid. Move only when the targets have their heads down, and freeze when they look up at you.
Sometimes it’s helpful to sit down and pause for a bit, with no intention of shooting, just to get them comfortable with you. When the birds appear to stop watching you, get up again and advance a few more yards.
If you’re at the beach hoping to photograph shorebirds, they often skitter away every time you advance, no matter how slowly. Sometimes the best strategy here is to observe the direction they’re going, walk past them (at a distance) and way ahead of them, and then get as low as you can in a spot parallel to their path—and simply wait for them to draw closer. Since you are low and still, they’ll be much less likely to see you as a threat.
4. Attract Birds at Home with Inventive Food and Feeder Offerings
To draw their subjects closer, photographers often capitalize on one of the most urgent needs of birds—hunger. When, where, and what to feed birds can raise ethical, environmental, and health concerns that are far-reaching, and anytime we decide to do so, we’re taking on a responsibility.
The healthiest, most natural (and most reliable) way to offer food to birds in your yard is to plant native trees and shrubs, such as serviceberry or crabapple, that are long-standing food sources.
Setting up bird feeders in the yard is a popular method used by many bird photographers. Fortunately, we know a lot about the best practices for backyard bird feeders, such as how far they should be from windows, how important it is to provide appropriate food, and how to keep feeders clean and cats indoors. When best practices are followed, research has shown that feeders may improve reproductive success and survival of some birds, particularly during harsh winters. Keep in mind that offering a range of foods (like suet or nectar, in addition to sunflower seeds) will attract a greater variety of bird species.
An attractive perch near your feeder is essential, whether it’s a branch already there or one you’ve set up. Birds need places to sit and scan for danger for a moment before flying in to the feeder. Some species also use perches to eat the seeds they’ve grabbed. The most aesthetically pleasing bird photos will feature the subject on natural-looking perches, not feeders.
For bird photography from your home, you can shoot from a tent blind set up in your yard, from your deck or porch, or from inside your house through an open window. The beauty of shooting from inside your house is that you can always be on the lookout, your camera at the ready. Just listen for the call of your favorite bird through open windows, like I do in spring and summer. Then grab your camera, position yourself (and maybe your tripod) by an open window, and fire away. This is exactly how I’ve taken some of my very favorite photos.
Melissa Groo is a wildlife and conservation photographer, a contributing editor to Audubon magazine, and a columnist for Outdoor Photographer magazine. Groo is the instructor for a bird photography online course offered by the Cornell Lab of Ornithology’s Bird Academy.
All About Birds
is a free resource
Available for everyone,
funded by donors like you
American Kestrel by Blair Dudeck / Macaulay Library