Caught in the Act: How to Photograph Birds in Action
Story and photographs by Marie Read
January 15, 2011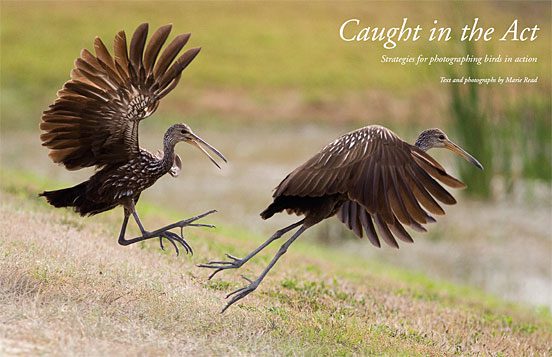
I love to look through old nature magazines to see how photographic styles have changed over the years. So, with time to kill in the library one day, I started leafing through old copies of Natural History magazine.
As I turned a page, a three-picture sequence caught my eye. In today’s nature photography circles, the spread of an Osprey lifting a fish out of the water would barely warrant a cursory glance—grainy and soft, shot on a gloomy day, blurred wings with little feather detail. What struck me, though, was the date of the magazine—February 1979. According to the caption, to obtain this “rarely photographed event,” the photographer, a 20-year-old Swede named Göran Bäckström, “sat in a blind on Lake Glan, Sweden, for 200 hours.” Back then this tenacious young man would have been using slow-speed film and manual-focus camera equipment to capture this action—quite an achievement.
Fast-forward 32 years. Do a Google image search for “Osprey catching fish” and you get 53,000 results. True, most of them are not Ospreys actually pulling a fish out of the water, but a number of stunning images show exactly that behavior, tack sharp with great feather detail, complete with flying water droplets caught in midsplash. No longer is this a rarely photographed event.
Yes, the buzz in bird photography these days is “action,” and it has been facilitated by advances in digital photography combined with learning opportunities spread throughout the Internet. Today’s digital cameras have opened up a world of natural-light, high-speed photography that would have been next to impossible in the days of film. Start out with high ISOs (equivalent to “film speed”) that allow super-fast shutter speeds. Add excellent noise reduction technology, developed to counteract the digital equivalent of film grain. Couple these with ever-faster autofocus and more accurate focus tracking, and the end result is the ability to show birds frozen in the midst of activities that can be over in the blink of an eye. Of course, it takes more than modern camera equipment and knowing how to use it to get these dramatic images. You also need opportunities—places to go where there is plenty of bird activity. And you need persistence, quick reflexes, and an in-depth knowledge of bird behavior.
Find Opportunities by Noticing Activity Patterns
The Internet is full of information about well-known bird photography hotspots as well as workshops and photo tours that promise to put you in the right place at the right time in great locations worldwide. But not everyone has the luxury of being able to travel to photograph birds in action. Fortunately, you can find opportunities in your own area, even in your own backyard.

Birds are creatures of habit. They often return repeatedly to a source of food or nesting material, or to a favorite perch or roosting spot. These predictable activities are photographic opportunities waiting to happen. It was by noticing a behavior pattern in my backyard that I obtained an image of two Black-capped Chickadees fighting in midair over a spent sunflower seed head. Most of the chickadees in the winter flock seemed to know their place in the dominance hierarchy, each waiting until the sunflower was unoccupied before taking its turn to feed. But two feisty individuals would bicker and fight if they arrived together. I framed the sunflower with plenty of space around it, manually focused on the seeds, then sat back to wait. Whenever two chickadees arrived together I held my finger down on the shutter release, taking advantage of my camera’s 10-frames-per-second frame rate.
Photo opportunities like this are all around you. Explore your favorite birding spots, always watching for behavior patterns you can take advantage of—whether it is the groups of Common Mergansers you’ve noticed courting on a local lake every spring, the nest-building Cliff Swallows you’ve seen gathering mud from a roadside puddle, or the herons flying to and from a tree in a suburban park carrying sticks for their nest.
Anticipate the Action by Reading Birds’ Behavior Cues
Birds often provide subtle cues—biologists call them intention movements—that something is about to happen. Taking flight is a good example. Perched birds from eagles to egrets signal they’re about to fly by crouching, defecating, or both. Cranes lean forward slowly, “craning” their necks, before running across the water to lift off. Ducks and geese flip their heads agitatedly before jumping off the water. If you notice these cues, get ready. Place your camera’s central autofocus point on the bird’s head or neck, keep your finger on the shutter, watch through the viewfinder, and wait. Fire the shutter as soon as the bird takes off and try to follow it as it flies.
Don’t Lose Your Concentration
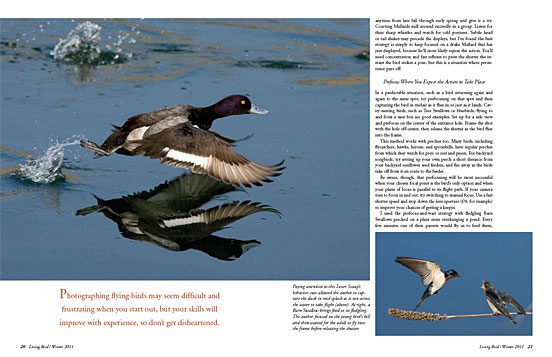
Waterfowl bathing and preening make very photogenic subjects, but for true drama stay focused on the bird until it finishes its body care ritual, because it will usually flap its wings. Your ability to concentrate may be put to the test, but it’s worth the wait. Be sure to frame the shot with space above the bird or you may clip off the wing tips. Avocets and other shorebirds often end their preening bouts with an elegant stretch, wings up, head down, whereas preening swallows often perform a graceful downward wing stretch, spreading all their beautiful flight feathers. For the latter, leave space at the bottom of the frame to include the entire wing.
Courting ducks perform dramatic and bizarre-looking displays. In male Mallards, teal, and other dabblers, these ritualized movement patterns go by intriguing names such as “grunt-whistle” and “head-up-tail-up.” Redheads and other diving ducks perform striking “head-throws.” Photographing these displays is challenging, because they’re unpredictable and each takes only a second. If you thrive on challenges, head to the local duck pond anytime from late fall through early spring and give it a try. Courting Mallards mill around excitedly in a group. Listen for their sharp whistles and watch for odd postures. Subtle head or tail shakes may precede the displays, but I’ve found the best strategy is simply to keep focused on a drake Mallard that has just displayed, because he’ll most likely repeat the action. You’ll need concentration and fast reflexes to press the shutter the instant the bird strikes a pose, but this is a situation where persistence pays off.
Prefocus Where You Expect the Action to Take Place
In a predictable situation, such as a bird returning again and again to the same spot, try prefocusing on that spot and then capturing the bird in midair as it flies in or just as it lands. Cavity-nesting birds, such as Tree Swallows or bluebirds, flying to and from a nest box are good examples. Set up for a side view and prefocus on the center of the entrance hole. Frame the shot with the hole off-center, then release the shutter as the bird flies into the frame.
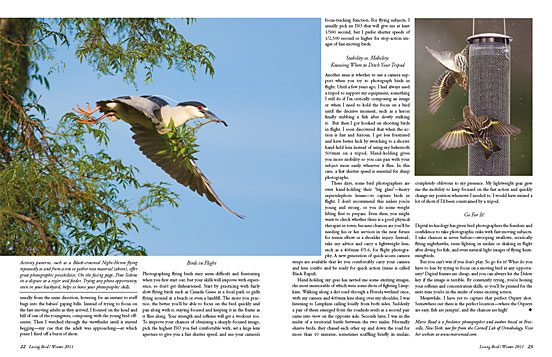
This method works with perches too. Many birds, including flycatchers, hawks, herons, and spoonbills, have regular perches from which they watch for prey, or rest and preen. For backyard songbirds, try setting up your own perch a short distance from your backyard sunflower seed feeders, and fire away as the birds take off from it en route to the feeder.
Be aware, though, that prefocusing will be most successful when your chosen focal point is the bird’s only option and when your plane of focus is parallel to its flight path. If your camera tries to focus in and out, try switching to manual focus. Use a fast shutter speed and stop down the lens aperture (f/8, for example) to improve your chances of getting a keeper.
I used the prefocus-and-wait strategy with fledgling Barn Swallows perched on a plant stem overhanging a pond. Every few minutes one of their parents would fly in to feed them, usually from the same direction, hovering for an instant to stuff bugs into the babies’ gaping bills. Instead of trying to focus on the fast-moving adults as they arrived, I focused on the head and bill of one of the youngsters, composing with the young bird off-center. Then I watched through the viewfinder until it started begging—my cue that the adult was approaching—at which point I fired off a burst of shots.
Birds in Flight
Photographing flying birds may seem difficult and frustrating when you first start out, but your skills will improve with experience, so don’t get disheartened. Start by practicing with fairly slow-flying birds such as Canada Geese at a local park or gulls flying around at a beach or even a landfill. The more you practice, the better you’ll be able to focus on the bird quickly and pan along with it, staying focused and keeping it in the frame as it flies along. Your strength and reflexes will get a workout too. To improve your chances of obtaining a sharply focused image, pick the highest ISO you feel comfortable with, set a large lens aperture to give you a fast shutter speed, and use your camera’s focus-tracking function. For flying subjects, I usually pick an ISO that will give me at least 1/500 second, but I prefer shutter speeds of 1/2,500 second or higher for stop-action images of fast-moving birds.
Stability vs. Mobility: Knowing When to Ditch Your Tripod
Another issue is whether to use a camera support when you try to photograph birds in flight. Until a few years ago, I had always used a tripod to support my equipment, something I still do if I’m critically composing an image or when I need to hold the focus on a bird until the decisive moment, such as a heron finally stabbing a fish after slowly stalking it. But then I got hooked on shooting birds in flight. I soon discovered that when the action is fast and furious, I get less frustrated and have better luck by switching to a shorter hand-held lens instead of using my behemoth 500mm on a tripod. Hand-holding gives you more mobility so you can pan with your subject more easily wherever it flies. In this case, a fast shutter speed is essential for sharp photographs.
These days, some bird photographers are even hand-holding their “big glass”—heavy supertelephoto lenses—to capture birds in flight. I don’t recommend this unless you’re young and strong, or you do some weight lifting first to prepare. Even then, you might want to check whether there is a good physical therapist in town, because chances are you’ll be needing his or her services in the near future for tennis elbow or a shoulder injury. Instead, take my advice and carry a lightweight lens, such as a 400mm f/5.6, for flight photography. A new generation of quick-access camera straps are available that let you comfortably carry your camera and lens combo and be ready for quick action (mine is called Black Rapid).
Hand-holding my gear has netted me some exciting images, the most memorable of which were some shots of fighting Limpkins. Walking along a dirt road through a Florida wetland once, with my camera and 400mm lens slung over my shoulder, I was listening to Limpkins calling loudly from both sides. Suddenly a pair of them emerged from the roadside reeds as a second pair came into view on the opposite side. Seconds later, I was in the midst of a territorial battle between the two males. Normally elusive birds, they chased each other up and down the road for more than 10 minutes, sometimes scuffling briefly in midair, completely oblivious to my presence. My lightweight gear gave me the mobility to keep focused on the fast action and quickly change my position whenever I needed to. I would have missed a lot of shots if I’d been constrained by a tripod.
Go For It!
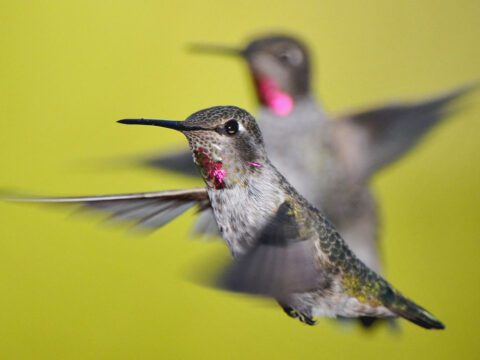
Digital technology has given bird photographers the freedom and confidence to take photographic risks with fast-moving subjects. I take chances as never before—swooping swallows, erratically flying nighthawks, terns fighting in midair or shaking in flight after diving for fish, and even natural-light images of flying hummingbirds.
But you can’t win if you don’t play. So go for it! What do you have to lose by trying to focus on a moving bird at any opportunity? Digital frames are cheap, and you can always hit the Delete key if the image is terrible. By constantly trying, you’re honing your reflexes and concentration skills, so you’ll be primed for the next time you’re in the midst of some exciting action.
Meanwhile, I have yet to capture that perfect Osprey shot. Somewhere out there is the perfect location—where the Ospreys are easy, fish are jumpin’, and the chances are high!
Marie Read is a freelance photographer and author based in Freeville, New York, not far from the Cornell Lab of Ornithology. Visit her website at www.marieread.com.

All About Birds
is a free resource
Available for everyone,
funded by donors like you
American Kestrel by Blair Dudeck / Macaulay Library

