

Bird Photography: 5 Steps To Help You Get Started
By Pat Leonard
July 17, 2009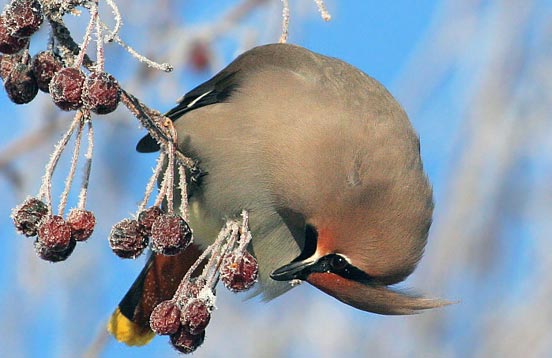
Originally posted April 2009. Updated July 2020.

With the explosion in availability and design of digital cameras, it’s now possible for hobbyists to take amazingly good photos. While most of us may never make it to Zanzibar on a shoot for National Geographic, you can up the “wow” factor in your bird photography by paying attention to a few basics. Beyond the mechanical aspects of shutter speed, aperture, and ISO, which nearly anyone can learn (and which cameras can increasingly do automatically), there is an indefinable something that transforms an image into a work of art. The ability to frame such photos is often thought of as talent, but just as often it’s the result of hours of practice and attention to the elements of an outstanding image. We spoke with four professional photographers to get their views on these core ideas in photography:

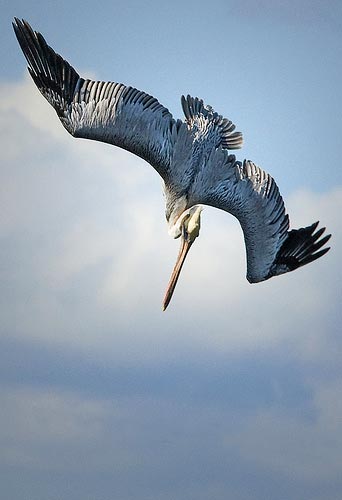
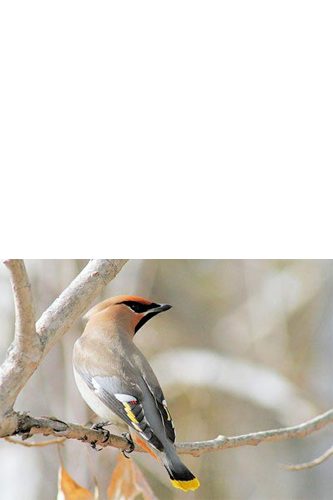
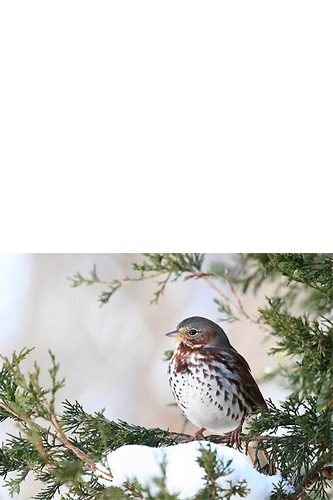
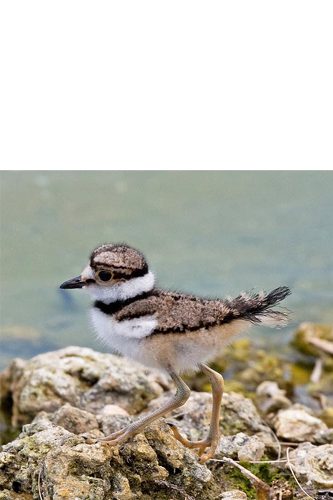
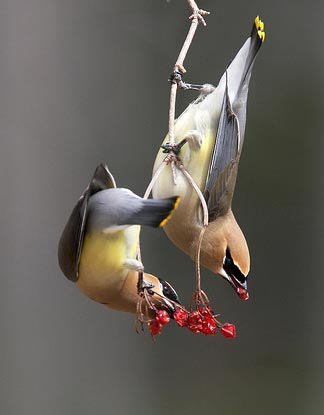
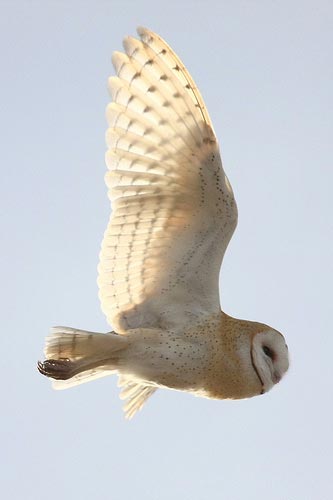
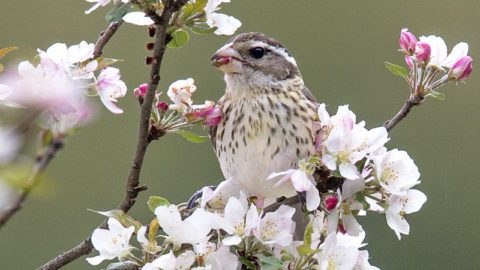
With light coming from a slight angle behind the photographer, this Brown Pelican's feathers show up in great detail and depth. Photo by eyeoftheartist via Birdshare. By accident or design, the plunging body of this Brown Pelican neatly separates blue sky from white cloud. The placement of the bird in the upper half of the frame accentuates the action. Photo by eyeoftheartist via Birdshare. The branch provides a frame-within-a-frame, focusing the eye on this Bohemian Waxwing. Photo by Joanne Bovee/Cornell Lab. The evergreen foliage frames this Fox Sparrow and balances its colors. Photo by Jean Kuns/Cornell Lab. By shooting this Killdeer chick from near ground level, the photographer makes it easier to identify with the subject. Photo by David McNicholas/Cornell Lab. The angle, the light, the soft colors, the behavior, and the artful poses of these Cedar Waxwings make this a stunning photograph. Photo by The Nature Nook via Birdshare. Don't be afraid to break the rules. Even centered and backlit, this is a stunning image of a Barn Owl in flight. Photo by Tim Lenz via Birdshare.

What are the fundamentals of bird photography?
1. Shoot at Sunrise and Sunset for the Best Lighting
“The angle, intensity, and hue of your light source can make or break a picture,” says photographer and Living Bird editor Tim Gallagher. He says the best times to shoot are morning and late afternoon when the light is angled, warmer, and more subdued. “It brings out all the color and texture of your subject’s plumage,” Tim says. It’s harder to take a good picture in the middle of a bright, clear day because images end up with too much contrast. Light areas get washed out and shadows turn inky black. Having the source of light behind and slightly to one side of you creates a more three-dimensional subject. Having your subject backlit rarely works well unless you’re deliberately going after a silhouette.
2. Practice Dynamic Framing
Professionals usually avoid placing any subject in the exact center of a photograph. It tends to be more visually stimulating to see the bird off to one side, facing inward. Our own eyes naturally follow the same trajectory. Likewise, avoid placing the horizon line in the middle of a picture which cuts it in half and divides the image. It’s better to frame the horizon in the top or bottom third of your photograph.
In the case of a flying bird, leave space in front of it, so it appears that the bird has somewhere to go. “It’s not necessary to have an expensive camera and lens to get quality bird-in-flight photos,” says Steve Wolfe. “All you need is a decent camera with auto-focusing capabilities, a red-dot sight to track the bird’s flight—plus patience, perseverance, and practice.”
3. Use the Environment to Enhance Composition
Non-bird elements in your picture can add or detract from a pleasing composition. Branches, shrubbery, rocks, and flowers can be a distraction—or they can be used artfully to frame the bird within the picture. Marie Read points out, “Birds don’t live in a vacuum. Showing the bird-habitat relationship is a compelling way to help others understand and appreciate the fascinating complexity of the natural word—and to tell a story.” Although you want to avoid having a branch right behind the bird, looking like it’s growing out of its head, incorporating some part of the bird’s habitat into the shot usually makes it better. If the background is too busy, try opening the aperture more to blur the background and make your subject stand out.
4. Use Angling to Your Advantage
More About Photography
You can shoot from a position that is higher than your subject, lower, at eye level, or somewhere in between. One position may be preferable over another depending on the terrain and what species of bird (or group of birds) you’re trying to photograph. But it’s important to consider this ahead of time. “Shooting from a bird’s eye level results in dramatic photos with an intimate feeling to them that you don’t get when the bird is viewed from above,” says Marie Read. To get closer to wary birds, try wearing muted clothing, hiding behind vegetation, and moving slowly in a zigzag pattern low to the ground. Bird blinds also work very well if you have the chance to set them up well ahead of time so the birds can become accustomed to them.
5. Take Time to Learn About Your Subject
To be the best bird photographer you can be you really have to know birds. Then you know where you’re likely to find them and what they might do next. For example, berry bushes attract Cedar Waxwings; herons haunt the edges of marshes and ponds; waterfowl often rest and preen in the same spot every day. “You’ll develop an almost intuitive sense of when a bird is going to fly,” says wildlife photographer Bobby Harrison. “Before a bird takes flight, it often stands very alert, turning its head in all directions. It also turns into the wind.” All the professionals quoted in this overview agree that the key to improving your bird photography is to spend a lot of time in the field and don’t be afraid to experiment!
All About Birds
is a free resource
Available for everyone,
funded by donors like you
American Kestrel by Blair Dudeck / Macaulay Library