

Add Spark to Your Winter Bird Photography With These Pro Tips
By Ray Hennessy
American Robin by Ray Hennessy. December 22, 2020Winter can be tough on photographers, with either bright snow or dull browns on offer. But with a bit of planning and some warm layers, you can still capture incredible images.

From the Winter 2021 issue of Living Bird magazine. Subscribe now.
Freezing cold temperatures. Bright white snow that can wash out photos. Or in areas that don’t get snow, no color at all—just a dull brown everywhere. It can be difficult for bird photographers to find the motivation to get out in winter.
However, winter also offers some great opportunities that aren’t available in other seasons. Different migratory birds show up in many areas, species that aren’t around in spring through fall. Generally, there are fewer people outside. With a bit of planning, the willingness to push yourself a bit, lots of warm layers—and a few winter bird photography tricks—you can be rewarded by making some incredibly unique and creative photos of your local birds in winter.
When bundling up, don’t forget your equipment can get cold too
Your camera may not be capable of getting frostbite, but the cold can quickly drain your batteries—which will end your outing regardless of how good the birds are. Keeping your photography gear going is a key issue in cold winter photography. Be sure to bring extra camera batteries and store them in an inside jacket pocket close to your body; your body heat will keep a spare battery charged longer. You may even find that placing a depleted cold battery in your pocket can give it a few minutes of extra life after it warms up.
Moving between cold outdoor temps and the warm indoors presents the possibility of your camera lens fogging up, or even frosting over, so be sure to acclimate your gear. That means don’t blast the heat in your car on the way out to photograph birds; better yet, keep your gear in the trunk. The same goes if you are stepping inside to take a break and warm up, but you plan to return to the cold shortly after. Plan ahead and give your gear time to slowly change temperatures going inside and outside, and you can mostly avoid a fogged or frosted lens.
Embrace the white; snow is your friend
In many areas winter brings snow-covered ground, which means you could be shooting photos in an almost all-white scene that can be tough on your camera’s light meter. Basically, your camera will be trying to get all the white snow exposed correctly, which often results in an underexposed and dark bird in your photo.
Thankfully, there are a few easy ways to correct this:
- If you are using auto ISO, then exposure compensation is your friend. Dial in some positive exposure compensation to tell your camera to lighten the overall photo. Look for the +/- button on your camera and try starting with 1 stop in the + direction, check your photo, and if your subject is still dark then increase the exposure compensation a bit more. If you are comfortable with using full manual exposure, then you will want to adjust your settings so the camera’s internal meter is showing roughly 1 stop lighter than neutral.
- The more snow you include in your photo, the lighter the overall image will be, so it may require more positive exposure compensation (more clicks in the + direction) to get your bird exposed just right, especially if it is a dark bird. The one benefit of all that snow is that it can act as a reflector, filling in dark shadows and allowing you to shoot in stronger sunlight than you would without snow.
- As always in photography, quality light is important. When photographing birds in the snow, shooting in midday harsh sunlight is likely going to look just as bad as it will on a warm summer day. Try your best to photograph birds in the early-morning and late-evening sun to get that beautiful golden glow on the bird.

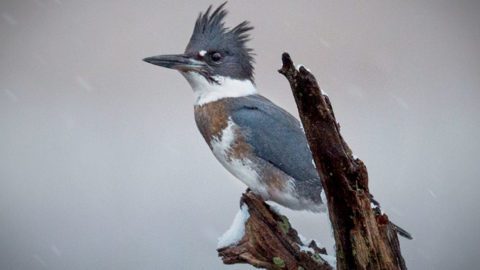
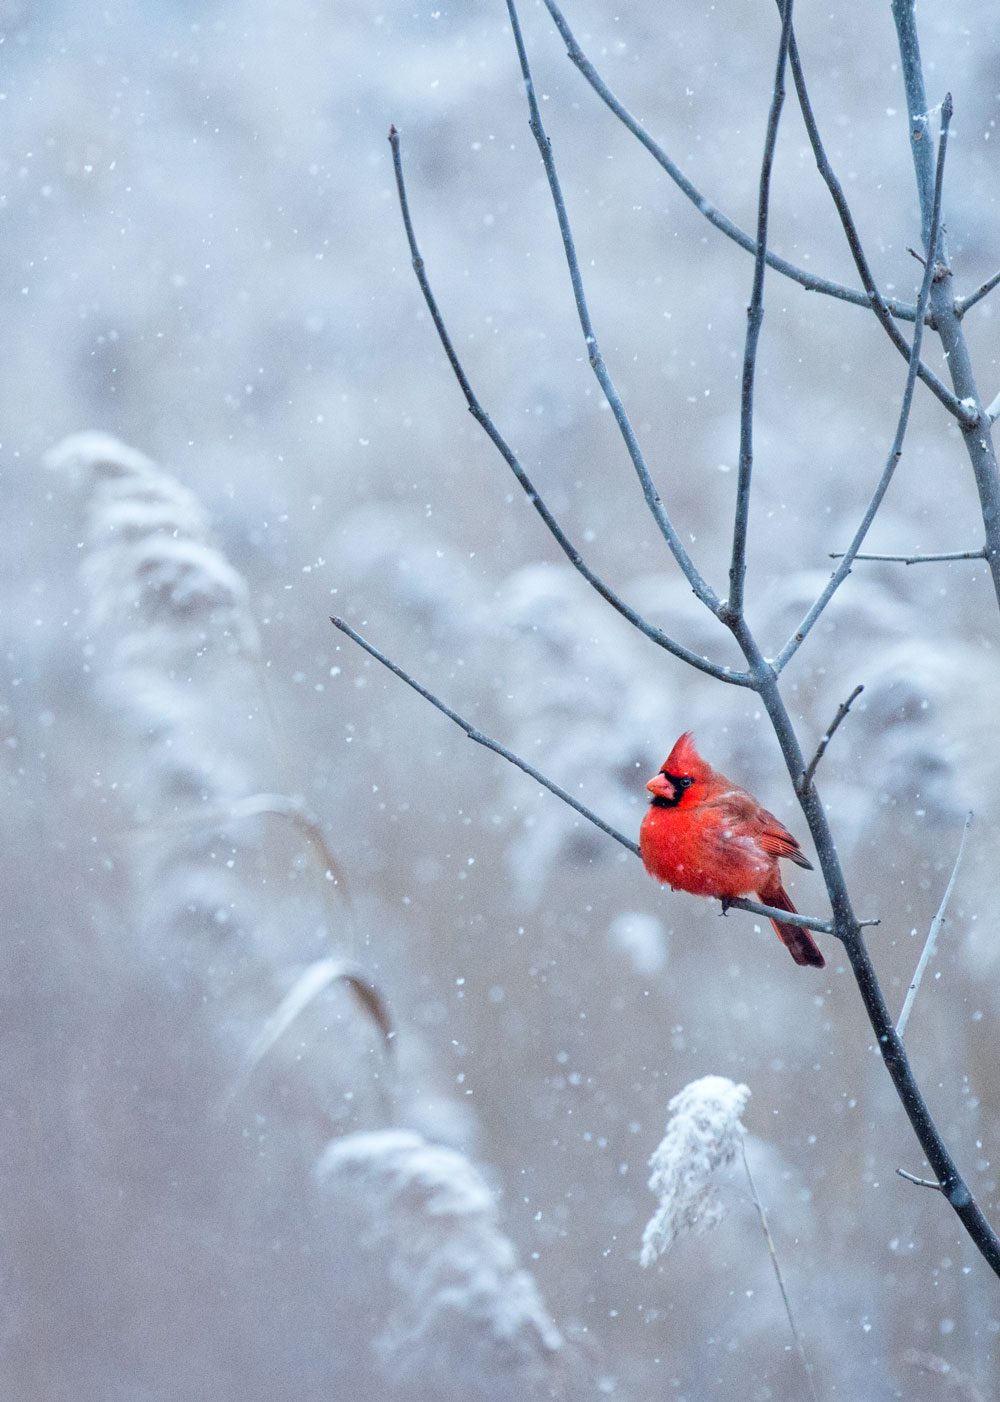
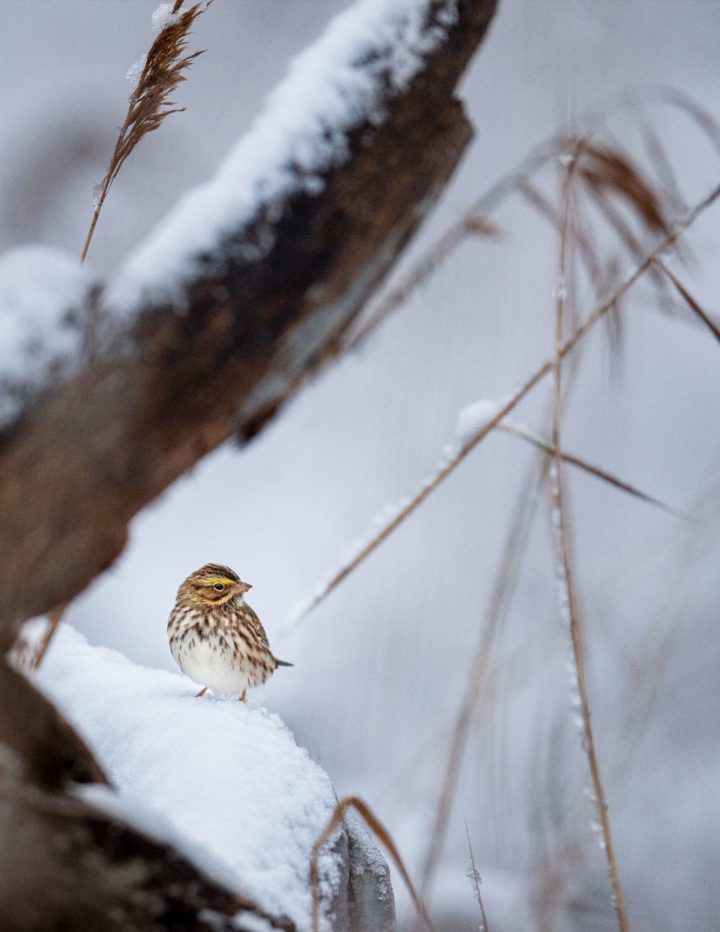
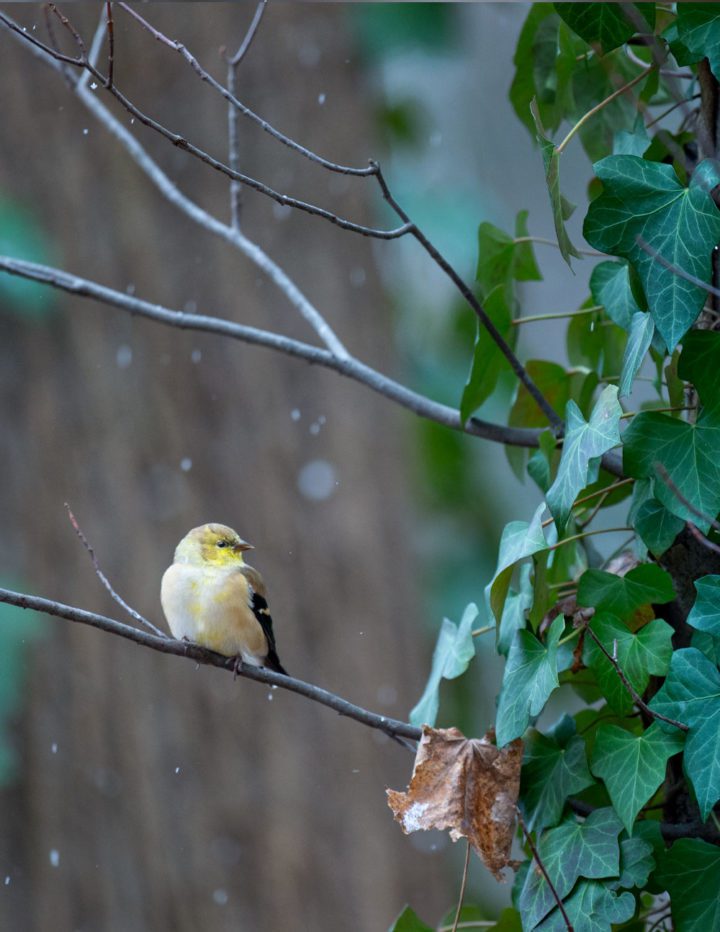
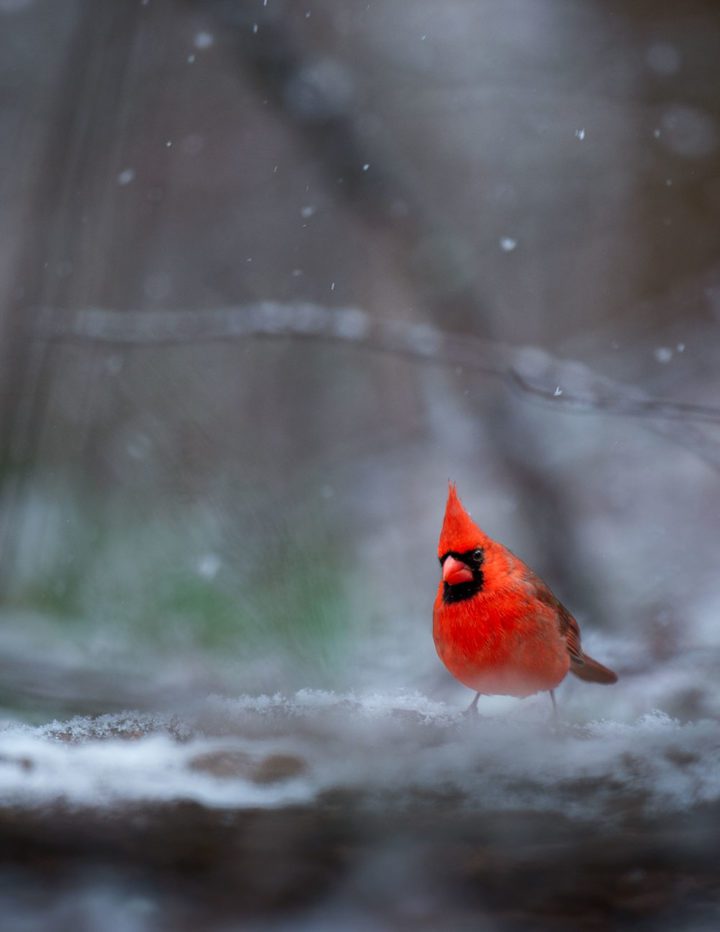
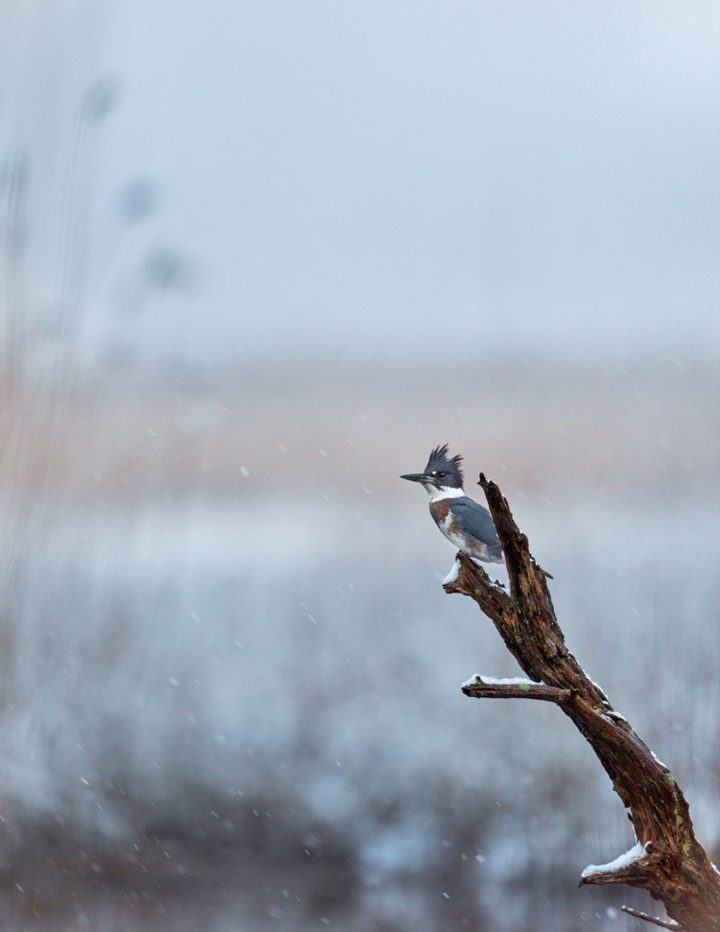
Savannah Sparrow by Ray Hennessy. American Goldfinch by Ray Hennessy. Northern Cardinal by Ray Hennessy. Belted Kingfisher by Ray Hennessy.
When it snows, go shoot photos!
Shooting in falling snow can be very challenging—snowflakes can distract the autofocus on your camera and make tracking a subject tricky. And of course, moisture is a risk for cameras and lenses. But when it works out, snowflakes create quite a special look. Including falling snowflakes in your bird photos helps to tell the story of the struggle for survival in winter and adds that unique element to your photos.
Many modern cameras and lenses have good weather sealing and can likely withstand a little bit of falling snow, but if you’re worried, consider purchasing a rain sleeve for your camera and lens to give you peace of mind. A basic plastic rain sleeve can be found online for under $10. I love to keep the small plastic ones folded up in my camera bag and always ready for unforeseen rain.
To show off falling snow, seek out areas with a darker background, so the snowflakes contrast with the setting and show up in your photos. As for camera settings, when it snows it’s often cloudy, so lighting conditions are darker and lighting can be muted. Slower shutter speeds and higher ISOs are the way to go. Try playing around with shutter speeds of at least 1/500 to freeze the falling snow. Even slower shutter speeds in the 1/100 to 1/250 range will allow the falling snow to streak through the scene, which can also create a unique look.

Embrace the winter browns
What if you live in an area that doesn’t get snow? How can you shoot lively photos of birds when everything in the setting is dead and brown? Simple—embrace the brown.
Since brown is not a bright or vivid color, your bird may stand out nicely against an out-of-focus brown background. Another option is to turn that brown into a warmer tone by shooting just after sunrise or before sunset. When low-angled sunlight shines on the brown tones of a winter field or forest, it can turn brown into a golden, almost orange color, and add some pop to your photos.
Even in the dead of winter many forests still have little bits of color—you just have to find them. Seek out evergreen trees for pops of green, or better yet look for colorful berries that hang on into winter. Vibrant red berries of sumac, warm red crabapples, or mountain ash berries all add a colorful splash to your winter bird photos.
The sunrise or sunset can also add color to your bird photos in an otherwise dull and lifeless background. On cold winter days, the dawn and dusk sky provide some beautiful pastel background tones, if you can photograph birds silhouetted against a sunrise or sunset. Don’t be afraid to push your shutter speed slower (1/250) or push the ISO up just a bit to capture these soft tones in your photos. The lighting effects of sunrise or sunset also work especially great with birds on and around water, as water reflects the sky’s pastel colors and can surround your subject in pinks and purples.
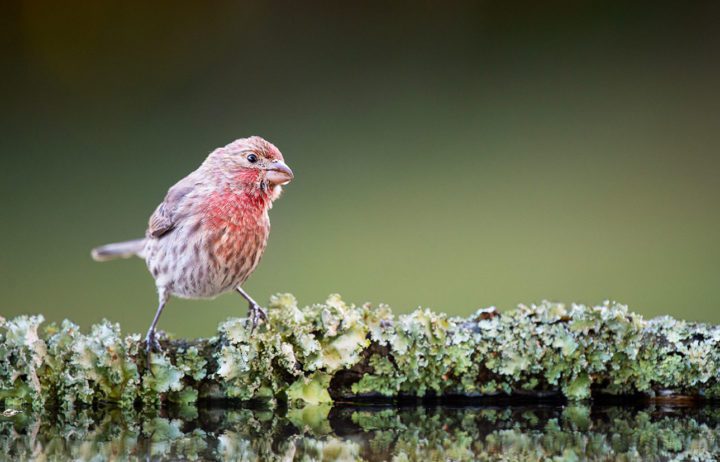
Lining a birdbath with black plastic can help capture clear reflections off the water surface, and the addition of natural materials can give the scene a natural feel. Adding a pump can keep the bath from freezing and the movement of the water can help attract birds. Photo by Ray Hennessy. A House Finch visits Hennessy’s birdbath—the arrow in the previous photo marks where it was perched. Photo by Ray Hennessy.
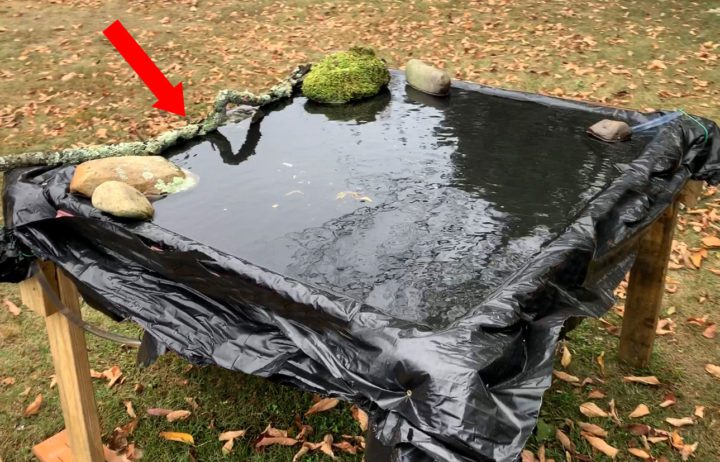
Bring the birds to you with fresh water
In colder climates, much of the available water for birds to drink can freeze. If you provide fresh water, you can save yourself the effort of venturing out to find birds in winter because the birds will come to you. Fresh water can bring the birds that don’t normally visit birdfeeders into your backyard; after all, not all species eat seed and suet, but all birds need water. (As a side note, water is also great for anyone who just plain wants to see more backyard birds, whether you’re a photographer or not—but it’s such a great draw, you might not be able to resist putting a camera on your new species.)

Adding a water element to your backyard in winter can be as simple as a standard birdbath with a heater. Or you can take it to the next level and create a reflecting pool customized for photography. Your reflecting pool doesn’t need to be deep (an inch or two of water), but it does need to be long enough to capture a bird’s entire reflection in the water. A basic wooden frame that’s roughly 2 to 3 feet wide and about 8 to 10 feet long should do the trick. Line the wooden frame with a black plastic liner, and you will get clear reflections of birds in your water feature. Add in some props such as rocks or branches for the birds to perch on to give your photos a natural look. If it’s cold where you live, you can either just add water on days when you want to photograph birds and drain it before it freezes, or maybe try adding a birdbath heater if temps only get down to slightly freezing.
If you provide water and birdseed in your backyard, you’ll have birds coming to eat, drink, bathe, and provide interesting photo opportunities all winter long.
Professional photographer Ray Hennessy specializes in using creative natural lighting and interesting compositions to capture unique images of common and rare wildlife. His favorite style of bird photo is a scenic composition that includes the habitat that wildlife lives within. The kingfisher on the front cover of this Winter 2021 issue is Hennessy’s third cover photo for Living Bird. He also shot the White-throated Sparrow photo that appeared on the front cover of the Autumn 2020 issue, and the Saltmarsh Sparrow on the back cover of the Spring 2020 issue.
All About Birds
is a free resource
Available for everyone,
funded by donors like you
American Kestrel by Blair Dudeck / Macaulay Library